
🎥 Need a visual walkthrough?
We’ve put together a step-by-step video series to help you connect your custom domain with ease. Whether you’re just getting started or verifying the final setup, these short clips will guide you through every part of the process:
Watch these videos as you go — they’re designed to be short, clear, and easy to follow.
1. How To Transfer Your Website Domain to Cohart - Squarespace Example
2. How To Transfer Your Website Domain to Cohart - General Example
If you prefer step-by-step instructions in text, or want to follow along in more detail, continue below for the full written guide.
Step 1: Purchase a Domain Name
- Visit a domain registrar like GoDaddy or Namecheap.
- Search for a domain that fits your name or brand (e.g.,
yourname.com,yourstudio.co). - Follow the steps to complete your purchase.
Step 2: Add your domain to Cohart
- Go to Custom Website
- In the Connect now to your personalized URL section, click on Change URL
- Enter your domain with “www” (e.g.,
www.yourname.com) - Click Connect URL
Once added, Cohart will generate a CNAME value for you.
💡 You’ll see a unique CNAME record right after you click Connect URL. You’ll need this in the next step.
Step 3: Update Your Domain’s DNS Records
- Go back to your domain registrar and open DNS Settings or Zone File Editor for your purchased domain.
- If your domain has existing A Records, you can either:
- Replace them with a CNAME Record, or
- Delete them and add a new CNAME Record
- Add CNAME using the value provided by Cohart:
- Name/Host 1:
www& Content 1:www.cohart.com - Name/Host 2 & Content 2: paste the value that Cohart gave you
- Name/Host 1:

- Save your changes.
Step 4: Verify and wait for DNS to Update
- Go back to your Custom Website page and click on Verify URL
- When both statuses are marked as ✓, your website is ready to use. If one or both statuses show ✗, the connection hasn’t been established yet. Please check that your domain’s DNS records are correctly configured.
- DNS updates can take anywhere from a few minutes to 48 hours to fully propagate.
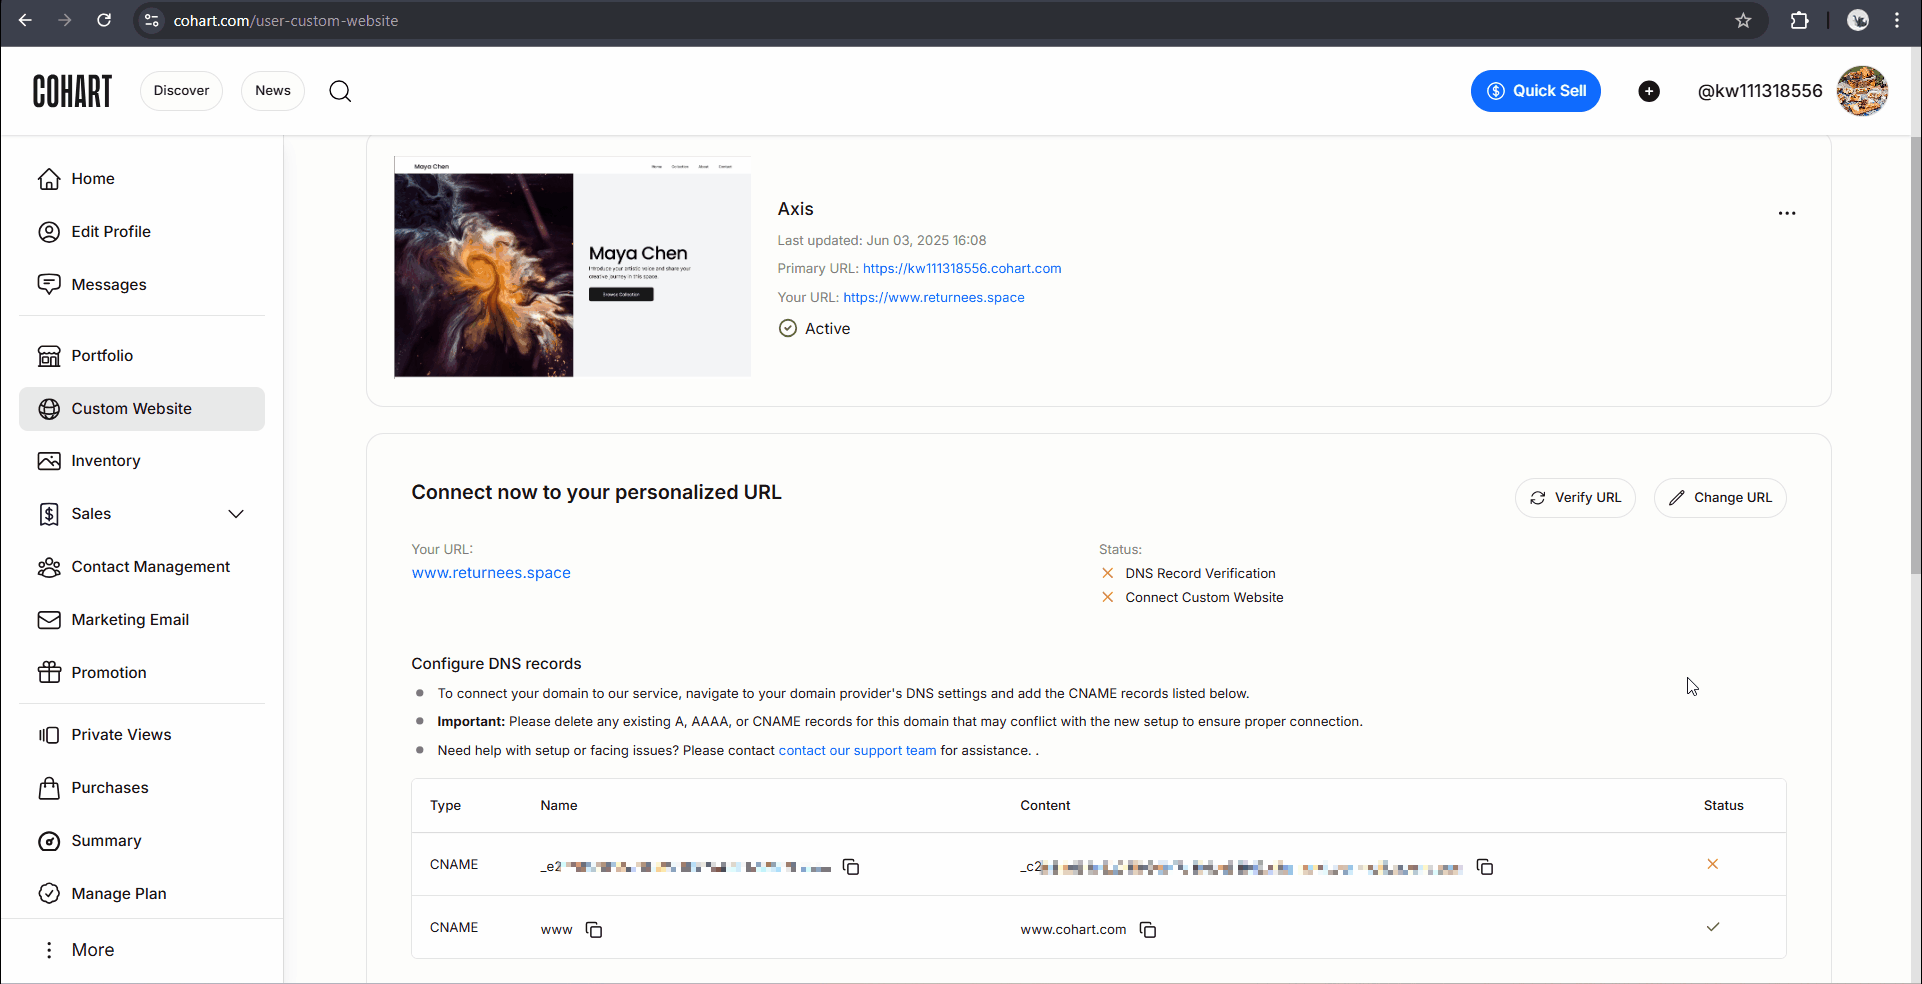
- During this time, your new URL might not work right away. That’s normal.
Step 5: Test Your URL
- After propagation is complete, click the blue link for your domain in Custom Website page, or enter your domain directly into a browser.
- If everything is connected correctly, you’ll land on your site.